What Is Cold Sublimation Transfer Printing?

Cold Sublimation Transfer Printing sounds simple: print a design, press it, and peel away the carrier. The practical details matter. In standard dye sublimation, heat turns dye into gas so it can bond with suitable polyester fibers or coatings. “Cold peel” usually describes removing the transfer film after it cools; it does not mean the dye transfers without heat. That distinction affects equipment settings, fabric choice, and the finish you see on a shirt or panel.

The market context is growing, but the numbers need careful interpretation. Grand View Research valued the global digital textile printing market at about $2.7 billion in 2022 and forecast 12.1% compound annual growth from 2023 to 2030. This figure covers digital textile printing broadly, not cold-peel sublimation alone. For a production team, the useful questions are more specific: Does the substrate contain enough polyester? Is the press temperature consistent across the platen? Does the transfer release cleanly after cooling? Small variations can leave pale edges or uneven color.

Textile-printing consultant Debbie McKeegan is a relevant industry voice on digital textile production. Her public commentary supports a practical takeaway, paraphrased here rather than presented as a direct quotation: successful results depend on matching the printing process to the material and its intended use. That is worth remembering. A vivid sample is not proof of durable production. This guide explains the process, materials, workflow, benefits, and limitations of Cold Sublimation Transfer Printing, while separating established practice from claims that need testing.
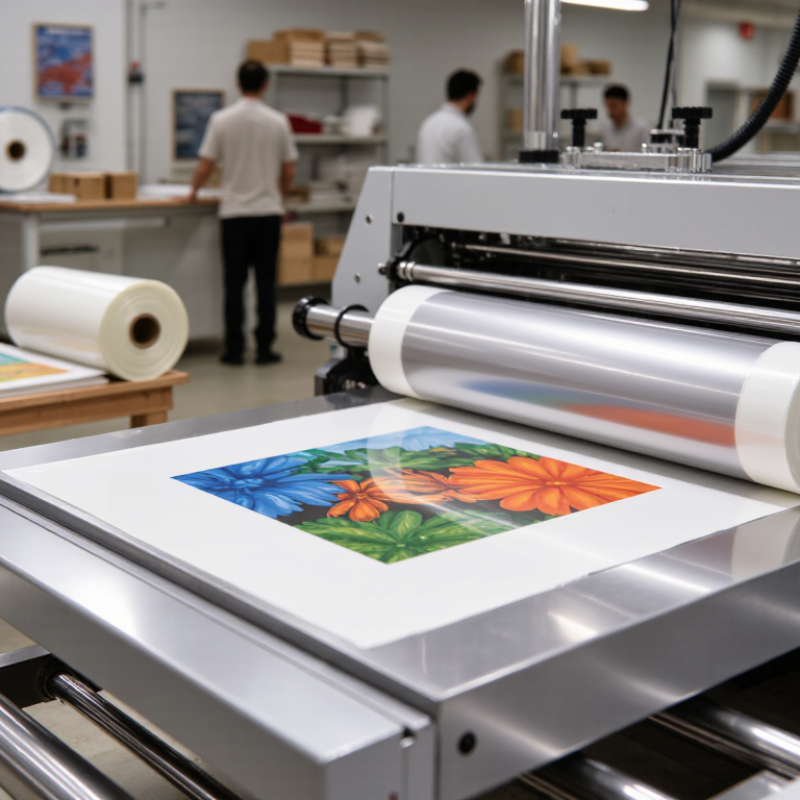
What Is Cold Sublimation Transfer Printing?

What Cold Sublimation Transfer Printing Means

What does “cold sublimation transfer printing” mean? The phrase can be confusing because sublimation dye needs heat to move from transfer paper into polyester fibers or a polymer-coated surface. “Cold” usually describes a cooling or peel stage, not a transfer performed at room temperature. In many workflows, a printed sheet is heat-pressed, then cooled before the paper is removed. That distinction matters.

During pressing, controlled heat and pressure turn the dye into gas, allowing it to bond with a compatible surface. The item may feel warm when the press opens. With a cold-peel paper, the operator waits until the transfer and material have cooled before peeling. Other papers are designed for hot peeling, so the correct timing depends on the transfer paper and equipment instructions. A rushed peel can cause blurred edges or uneven color.

A practical check is to test a small piece of the intended material and inspect the result under natural light. Look for sharp details, even color, and no visible ghosting. Sublimation works best on suitable polyester or coated surfaces; ordinary cotton will not accept the dye in the same way. The terminology is imperfect, and I would not assume “cold” explains the entire process.

Materials and Equipment Used in the Process

Cold sublimation transfer printing uses heat to move dye from printed transfer paper into a compatible surface. “Cold” usually describes peeling the paper after it cools, not a room-temperature transfer. The exact workflow can vary, so check the transfer paper’s instructions before setting up.

The basic materials are sublimation transfer paper, sublimation ink, and a substrate with a polyester surface or coating. Common examples include polyester fabric and coated blanks. Cotton alone generally does not retain sublimation dye well. A clear, dry surface helps; dust or moisture can leave visible marks. Small defects happen.

A sublimation-capable printer lays down the image, while a heat press supplies controlled temperature, pressure, and time. Use a lint-free cloth to prepare fabric, heat-resistant tape to hold the paper, and protective sheets to keep ink off the press platen. A temperature probe can help check the press, since its display may not match the working surface exactly. Let the transfer cool before peeling, as required by the paper instructions. Test on a spare piece first. That step can feel wasteful, but it may reveal uneven pressure or color shifts before a larger run.

How the Design Is Printed and Prepared for Transfer

Preparing a cold-peel sublimation transfer starts with artwork sized to the final product. Text and graphics are usually mirrored before printing, so they read correctly after transfer. A printer lays sublimation ink onto transfer paper; the paper holds the dye until it is pressed onto a compatible polyester or polymer-coated surface. Keep edges clean. Dust, moisture, or a paper wrinkle can leave a pale spot or an unwanted line. Let the print dry fully, then trim excess paper if it could interfere with alignment.

“Cold” usually describes when the transfer paper is removed, not a heat-free printing method. Heat and pressure move the dye into the receiving surface. After pressing, allow the item to cool before peeling away the paper. Pulling it too soon can blur details or disturb the image. Check the paper’s orientation and the press settings for the specific material, since coatings and thicknesses vary. A small test transfer can reveal color shifts or alignment problems before a larger run. Even with careful preparation, a faint edge may remain; that is worth inspecting rather than assuming every transfer will look perfect.

How the Image Moves from Transfer Paper to the Substrate

In many workflows, “cold sublimation” describes a transfer that is peeled after cooling; heat still drives the image transfer. The design is printed in sublimation ink onto coated transfer paper. During pressing, the paper sits face down against a compatible polyester fabric or polymer-coated surface. A clean, flat contact matters.

Under controlled heat and pressure, the ink changes into gas and moves from the paper into the substrate’s polymer layer. The color does not simply rest on top like a sticker. It penetrates the surface, then becomes trapped as the material cools. That is the key. Once the transfer is cool, the paper can be peeled away, leaving the image behind. On a polyester shirt, for example, the fibers should be smooth and free of lint before pressing.

Not every surface works. Cotton without a suitable coating usually cannot hold sublimation dye in the same way, and results vary with temperature, pressure, time, and material finish. A slight paper shift can create a blurred edge; too much heat may dull colors. The process can feel straightforward, but settings still need checking against the substrate instructions and a small test transfer. Sometimes the paper looks perfect, yet the final color surprises you.

What Is Cold Sublimation Transfer Printing? — How the Image Moves from Transfer Paper to the Substrate
Stage What Happens Image or Material Movement Key Conditions
1. Prepare the artwork The design is arranged for the target item. Text and directional graphics are commonly mirrored before printing. The artwork is prepared so it will read correctly after transfer. Check the print layout, dimensions, and orientation before printing.
2. Print onto transfer paper Sublimation ink is printed onto coated transfer paper using a compatible printing system. The image remains on the paper as dried ink; it has not yet moved into the substrate. Use paper and ink designed for sublimation, and allow the print to dry as directed.
3. Position the transfer The printed side of the paper is placed against a suitable substrate, such as polyester fabric or a polymer-coated blank. The paper holds the image in contact with the surface that will receive it. Keep the paper and substrate flat and secure to reduce shifting or blurred edges.
4. Apply heat and pressure A heat press supplies controlled heat and pressure for a specified time. Heat changes the sublimation dye into vapor. The dye moves from the paper toward the substrate and diffuses into compatible polymer fibers or coatings. Many applications use roughly 180–200°C (356–392°F) for about 30–60 seconds, but the correct settings depend on the ink, paper, substrate, and equipment.
5. Remove the transfer paper After pressing, the paper is peeled away according to the process instructions. The paper is removed; the transferred dye remains within the receptive polymer rather than forming a separate printed film on top. Some workflows call for cooling before peeling. “Cold” may describe this peel timing; sublimation itself still requires heat.
6. Cool and inspect The item is allowed to cool, then checked for color, alignment, and image defects. The dye is held within the substrate’s polymer layer or fibers, producing the finished image. Results depend on substrate composition, surface coating, temperature, time, pressure, and accurate color settings.
Material compatibility Sublimation works best on polyester textiles and items with a suitable polymer coating. Natural, untreated cotton does not readily retain sublimation dye because it lacks the required receptive polymer structure. For blends, image strength can vary with the polyester content. Always follow the substrate supplier’s processing guidance.
Typical result The finished image can have a smooth feel because the dye is integrated into the receptive material rather than applied as a thick surface layer. Color and durability depend on the substrate and on correct transfer conditions. A test press is recommended when changing materials or settings.

Common Applications and Practical Limitations

In sublimation printing, “cold” usually refers to the transfer paper’s peel method: the printed sheet cools before removal. The ink becomes gas under heat and bonds with polyester fibers or a polymer-coated surface. This process is used for sportswear, team shirts, cushion covers, mugs, and small signs. On a finished garment, the color sits within the fibers, so the print usually feels smooth rather than raised. Details matter.

The method suits pale polyester fabrics and prepared hard goods, but untreated cotton is not a reliable target. A coated mug may print well, while an uncoated one can look faded or uneven. Results depend on time, temperature, pressure, and the substrate’s coating. In practice, a small test transfer can reveal pale corners, blurred edges, or ghosting before a larger run.

The cooling step also takes time, and peeling too early may affect the result. It is easy to blame the paper. Sometimes the press pressure is the real issue. One practical limitation is material choice: color and durability can vary widely across fabrics and coatings, so sample testing remains useful.

NEW JERSEY

Location

Union Tool & Mold is a mold making, repair and plastic injection molding company located in central New Jersey.
(973) 763-6611

220 Rutgers St, Maplewood, NJ 07040
ACCREDITED

Certified Company


SOCIAL PROFILE

Let’s Connect

We invite you to engage with us on LinkedIn, where you can stay updated on our latest news, insights, and professional opportunities.