How to Choose the Best Welding Leather Cape?
Welding work can turn a brief spark into a painful burn. Choosing a Welding Leather Cape is therefore more than comparing leather thickness or price. The right cape should help shield the shoulders, chest, and upper arms from sparks and heat while allowing comfortable movement. A stiff collar, exposed seam, or short overlap can matter during overhead work.
Workplace data gives useful context, though it does not measure cape performance. The U.S. Bureau of Labor Statistics recorded 2.6 million nonfatal workplace injuries and illnesses in private industry during 2023. That figure covers many occupations, not welding alone, but it reinforces the value of task-specific protection. OSHA’s welding, cutting, and brazing guidance also identifies sparks, hot metal, and radiant energy as hazards requiring appropriate protective equipment. These sources cannot tell you which cape fits your shop; they clarify what the garment must help manage.
A careful choice starts with the welding process, working position, exposure level, and other protective clothing worn underneath. Check the label and documentation against EN ISO 11611, which sets requirements for protective clothing used in welding and allied processes. Inspect closures, stitching, coverage, and ease of movement, then consider whether the cape works with your jacket, gloves, and helmet. A thicker cape is not automatically the safer one. Fit can be imperfect, and real work often reveals gaps that a product description misses. The best choice is the one that provides suitable coverage without restricting the movements your task demands.
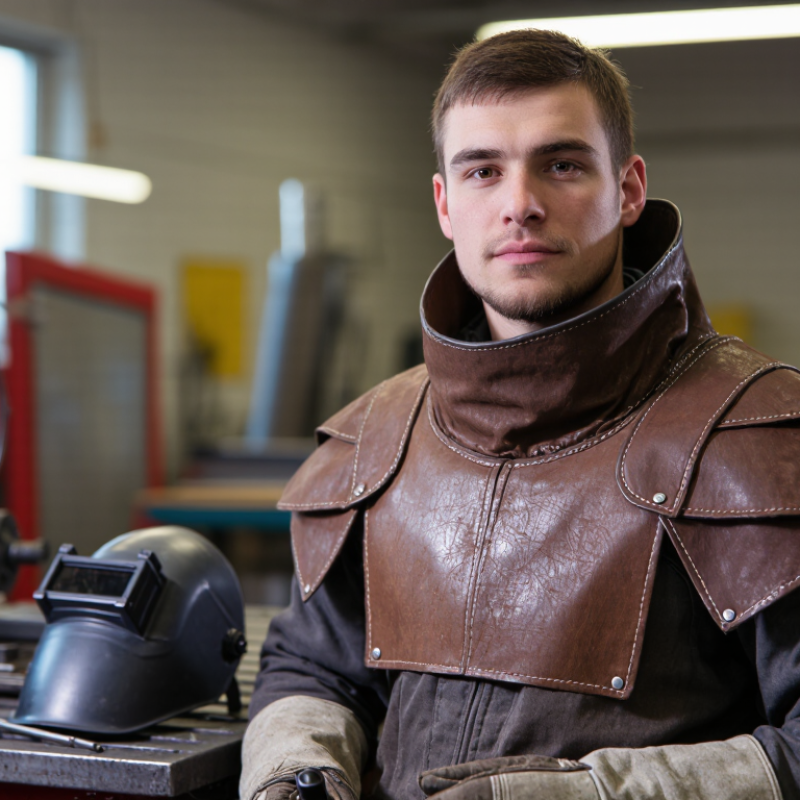
Define the Cape’s Role in Welding PPE Under OSHA 1910.252
OSHA 1910.252 addresses welding hazards such as fire prevention and suitable protective clothing. It does not require a specific leather cape. Instead, it requires clothing appropriate to the exposure when workers are not otherwise protected. A cape can help cover the neck, shoulders, and upper arms where sparks and hot spatter may land.
Think of it as one layer in a PPE system, not a stand-alone solution. A well-fitted cape should overlap the jacket without restricting movement at the torch or workbench. Check that its leather is dry, intact, and free of open seams; a small gap near the collar can expose skin. It helps. Pair it with suitable gloves, eye and face protection, and other clothing selected for the task’s hazards.
The cape does not prevent fires or replace required safeguards, such as controlling nearby combustibles and using a fire watch when conditions call for one. Nor does leather stay protective forever. Inspect it for stiff, burned, or thinning areas, especially where repeated spatter hits the shoulders. One detail is easy to overlook: bulky closures or loose edges can catch on equipment. Fit matters, and sometimes the most protective-looking cape is simply too awkward for the job.
How to Choose the Best Welding Leather Cape? - Define the Cape’s Role in Welding PPE Under OSHA 1910.252
| Selection factor | What to assess | How a leather cape can help | Limits and decision |
|---|---|---|---|
| Hazard and task | Identify the process, work position, spark direction, hot-metal exposure, and nearby combustible materials before selecting PPE. | Adds a protective layer over the shoulders and upper arms where sparks and spatter may land. | A cape is not a substitute for a task-specific PPE assessment or required fire-prevention measures. |
| Coverage | Check the back, shoulders, chest, and sleeve coverage against the worker’s posture and the direction of exposure. | Useful as supplemental coverage over a suitable welding shirt or jacket, especially for overhead or awkward-position work. | A cape may leave the front, lower arms, hands, and lower body exposed. Add other protective clothing as the hazard assessment requires. |
| Material and construction | Review the garment’s intended use, leather condition, seams, edges, closures, and any manufacturer care instructions. | Leather can provide a durable barrier against sparks and spatter when the garment is suitable for the task and remains in good condition. | Performance varies by material and construction. Do not assume every leather cape has the same heat resistance or protection rating. |
| Fit and mobility | Try the cape over the clothing worn for work. Check reach, shoulder movement, neck comfort, and whether the garment shifts or snags. | A properly fitted cape can add coverage while allowing normal movement and access to controls and tools. | A cape that is too loose, restrictive, or poorly secured may interfere with work or create additional hazards. |
| Compatibility with other PPE | Check that the cape works with the welding helmet, eye and face protection, gloves, sleeves, jacket, and any required respiratory or hearing protection. | Can complement other protective clothing when the layers overlap appropriately and do not obstruct equipment. | It does not replace a welding helmet, suitable eye protection, gloves, or other PPE required for the hazards present. |
| Inspection and upkeep | Before use, look for holes, tears, open seams, damaged fasteners, heavy contamination, or other defects that could reduce protection. | A sound, properly maintained cape can continue to provide its intended coverage. | Remove damaged or contaminated garments from service and follow applicable workplace procedures and care instructions. |
| OSHA role | OSHA 29 CFR 1910.252 addresses welding, cutting, and brazing hazards, including protective clothing and fire prevention. | A leather cape may be one component of protective clothing selected for the worker’s exposure. | Section 1910.252 does not prescribe a specific “welding leather cape.” Select PPE based on the applicable OSHA requirements and the hazards of the work. |